
Deal Planner
- Overview
- Prerequisite
- Accessing the Avails
- Generate a Deal Plan workflow
- Estimate calculation for plan Workflow
Overview
Use the Planner page to estimate inventory availability before creating a deal.
The Planner guides you through configuring pricing, targeting, and deal settings, allowing you to generate inventory estimates before publishing your deal.
Before you begin
Before using the Planner page, ensure that you are logged into the Deal Portal. see Logging into the Deal Portal.
Accessing the Planner
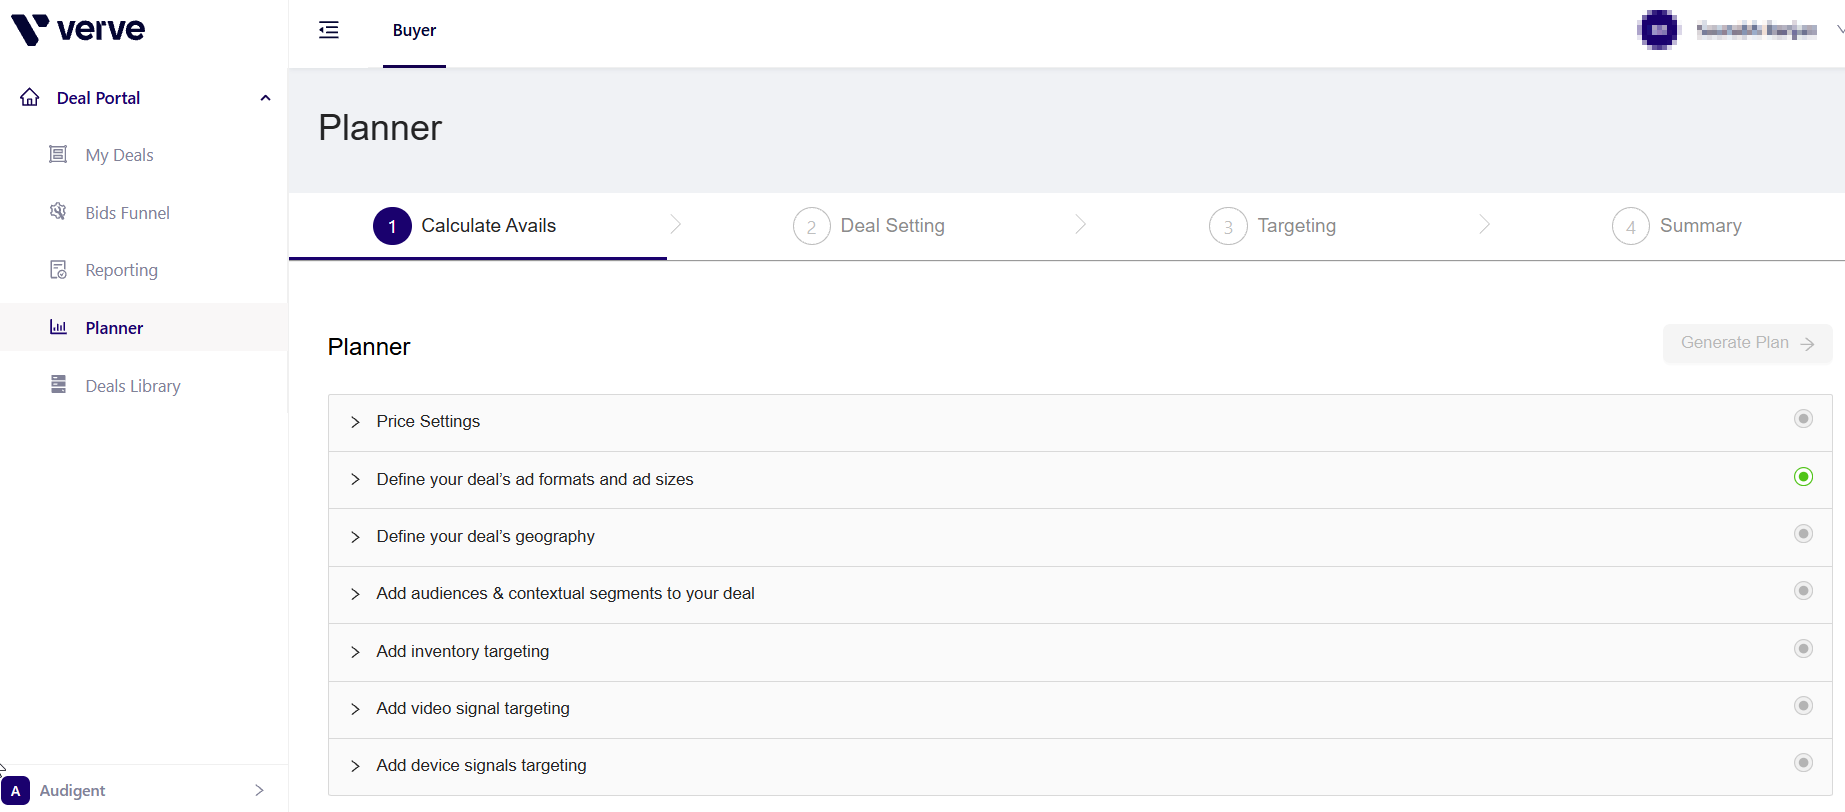
- From the left navigation menu, click Planner.
- The Planner page opens, allowing you to configure the deal plan settings.
Workflow
The Planner guides you through a four-step workflow to estimate inventory availability and create a deal. During the deal planning process, you define pricing and targeting criteria, review estimated inventory, configure deal settings, and finalize the deal.
| S.No | Step | Description |
|---|---|---|
| 1 | Calculate Avails | Configure pricing and targeting criteria, then generate an inventory availability estimate. |
| 2 | Deal Setting | Enter the deal information and review the pricing values carried over from the availability calculation |
| 3 | Targeting | Review and refine the targeting configuration before creating the deal. |
| 4 | Summary | Review all deal settings and targeting information before saving the deal |
Step1 : Calculate Avails workflow
The Calculate Avails step is the starting point of the Planner workflow. In this step, you define the pricing and targeting criteria used to estimate available inventory for your deal.

Calculate Avails section
The Calculate Avails section includes the following sections to configure and adjust your deal settings:
- Price Settings: The Pricing Model is fixed to Fixed Price. Enter the eCPM value used to estimate available inventory.
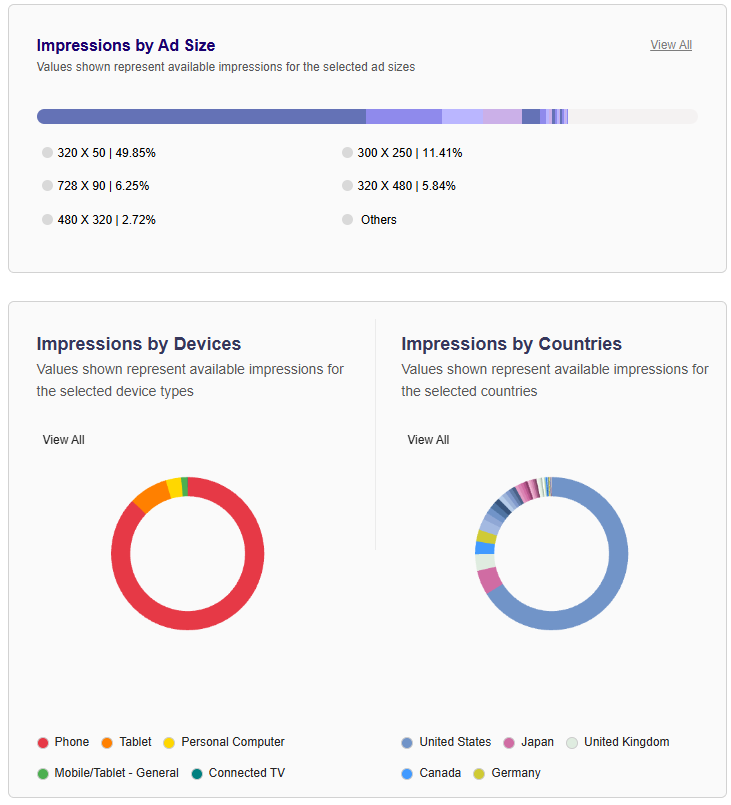
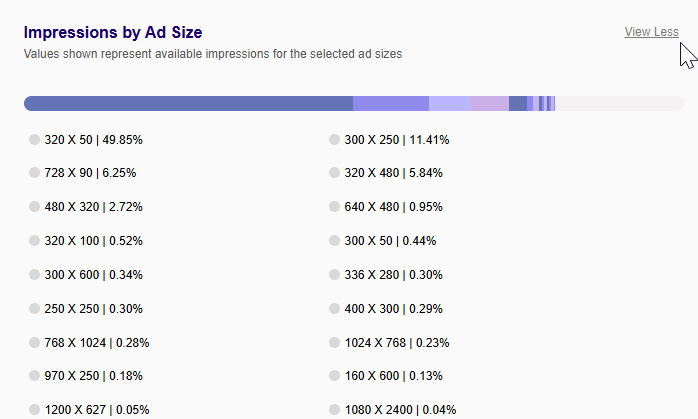
- Define your deal's ad formats and ad sizes: Select the ad formats and ad sizes to include in the deal plan.
- Define your deal's geography: Specify the countries or regions to include or exclude from the deal.
- Add audiences & contextual segments to your deal: Select audience and contextual segments to refine your targeting.
- Inventory targeting: Configure the inventory and device type targeting for the deal.
- Add video signal targeting: Configure video-specific targeting criteria, if applicable.
- Add device signals targeting: Configure device operating systems and related device targeting criteria.
1. Price Settings:
The Price Settings section allows you to define the pricing used to estimate available inventory for your deal.

Configure Price Settings
To configure the price settings:
-
Expand the Price Setting section.
-
Review the Pricing Model. The Pricing Model is set to Fixed Price by default and cannot be modified.
-
In the eCPM field, enter the effective cost per thousand impressions (eCPM) for your deal.

eCPM field
-
Continue configuring the Targeting settings in Calculate Avails.
-
After completing the required Planner sections, click Generate Plan to calculate the estimated inventory.
Note
- The eCPM field is required. After you enter a valid eCPM value, the Generate Plan button becomes available.
- The fixed eCPM value from Price Settings is automatically carried over to the eCPM field in the Deal Settings section.
- The Planner uses the entered eCPM value to estimate inventory availability based on the selected targeting criteria.
2. Define your deal’s ad formats and ad sizes:
The Define your deal's ad formats and ad sizes section allows you to specify the ad formats and creative sizes to include in the inventory estimate.

Define Ad Formats and Ad Sizes
To configure the ad formats and ad sizes:
-
Expand the Define your deal's ad formats and ad sizes section.
-
In the Ad Format field, review the targeting mode. By default, Allow is selected.
-
Click Please select, and then select one or more ad formats to include in the deal plan.

Select Ad Format options
-
In the Ad Size field, review the targeting mode. By default, Allow is selected.
-
Click Please select, and then select one or more ad sizes to include in the deal plan.

Select Ad Size options
-
Continue configuring the remaining Targeting sections in Calculate Avails.
-
After completing the required Planner section, Click Generate Plan to estimate the available inventory.
-
The Planner estimates available inventory based on the selected ad formats and ad sizes, together with the pricing and targeting criteria configured in the other Planner sections.
3. Define your deal’s geography:
The Define your deal's geography section allows you to specify the geographic locations to include or exclude when estimating available inventory.

To configure the geographic targeting:
-
Expand the Define your deal's geography section.
-
The Country column shows available countries for deal selection.
-
In the Country search bar, type the name of the country, you wish to target or block.
-
For each country or region listed:
- Click on the Allow button if you want to include the country/region in your targeting.
- Click on the Block button if you want to exclude the country/region from your targeting.
-
At the bottom of the geography section, you’ll see a Country Summary displaying an overview of your current selections (countries allowed or blocked). This gives you a quick view of your targeting choices. (for example, selecting the US).

-
Click Generate Plan to estimate impression based on CPM.
-
This system calculates expected impressions for the selected country at the given CPM.
4. Add Audiences and Contextual Segments Workflow:

- From the Data Providers dropdown, select the appropriate provider (for example, Fusion Audience).
- This will display the available audience segments for the selected provider.
- Select Fusion Audience:
- Click on the Fusion Audience option under the Data Providers section to reveal more audience targeting options.
- Fusion Audiences include categories like Demographics, InMarket, Interest, and Topic.
- Check the specific categories you wish to include in your targeting.
- Choose the Segments to Include:
- Browse the available audience segments such as New Movers, Gender: Male, Age: Seeded 25-34, and more.
- Click on the Include button next to the segment you wish to add to your deal targeting.
- If you wish to remove a segment from your deal, click on the Exclude button next to that segment.
- The selected audience segments will be grouped under an OR condition. For example, if you select multiple segments, they will be included in the targeting with an OR Within logic.
- Review the Targeting Summary:
- In the Targeting Summary panel on the right, you will see a breakdown of the selected segments, including CPM (cost per thousand impressions) for each.
- The summary also provides details about the total audience segments and total cost range.
- Once you’ve reviewed your selection, click the Update Audience button to apply your audience and contextual segment choices.
- After updating the audience selection, proceed to the next stages of deal setup, such as Inventory Targeting and Device Signals Targeting.
5. Add Inventory targeting
The Inventory Targeting section allows you to target or exclude inventory based on the Channel and Device Type.

Add Inventory targeting section
To configure the inventory targeting:
-
Expand the Add inventory targeting section.
-
In the Channel field:
-
In the Device Type field:
- Review the targeting mode. By default, Allow is selected.
- Click Please select, and then select one or more device types to include in the deal plan.

Select Device Type options.
-
Continue configuring the remaining Targeting sections in Calculate Avails based on your requirements.
-
After completing the required Planner sections, click Generate Plan to estimate the available inventory.
-
Click Generate Plan to estimate CPM impressions based on CPM.
-
The Planner estimates available inventory based on the selected Channel and Device Type, together with the pricing and targeting criteria configured in the other Planner sections.
6. Add device signals targeting
The Define your deal's video signal targeting section allows you to refine your inventory estimate by targeting video content based on Content Channel, Genre, Content Rating, Content Language, Content Livestream, and Content Network.

- Click to expand the Add device signals targeting to select the operating systems for your deal.
- From the Device OS section, click Allow for the platform you want to target (for example, App, Web, CTV).
- For each selected device platform (for example, Web, App), define the Device OS Nesting:
- Web: Choose operating systems such as Windows, macOS, and Chrome OS.
- App: Choose the relevant operating system for app targeting.
- Click Allow for each of the device operating systems that match your campaign.
- Click Generate Plan to process your deal plan with the selected device OS targeting.
- The system calculates expected impressions at the given CPM for your chosen settings.
Estimate calculation for plan Workflow
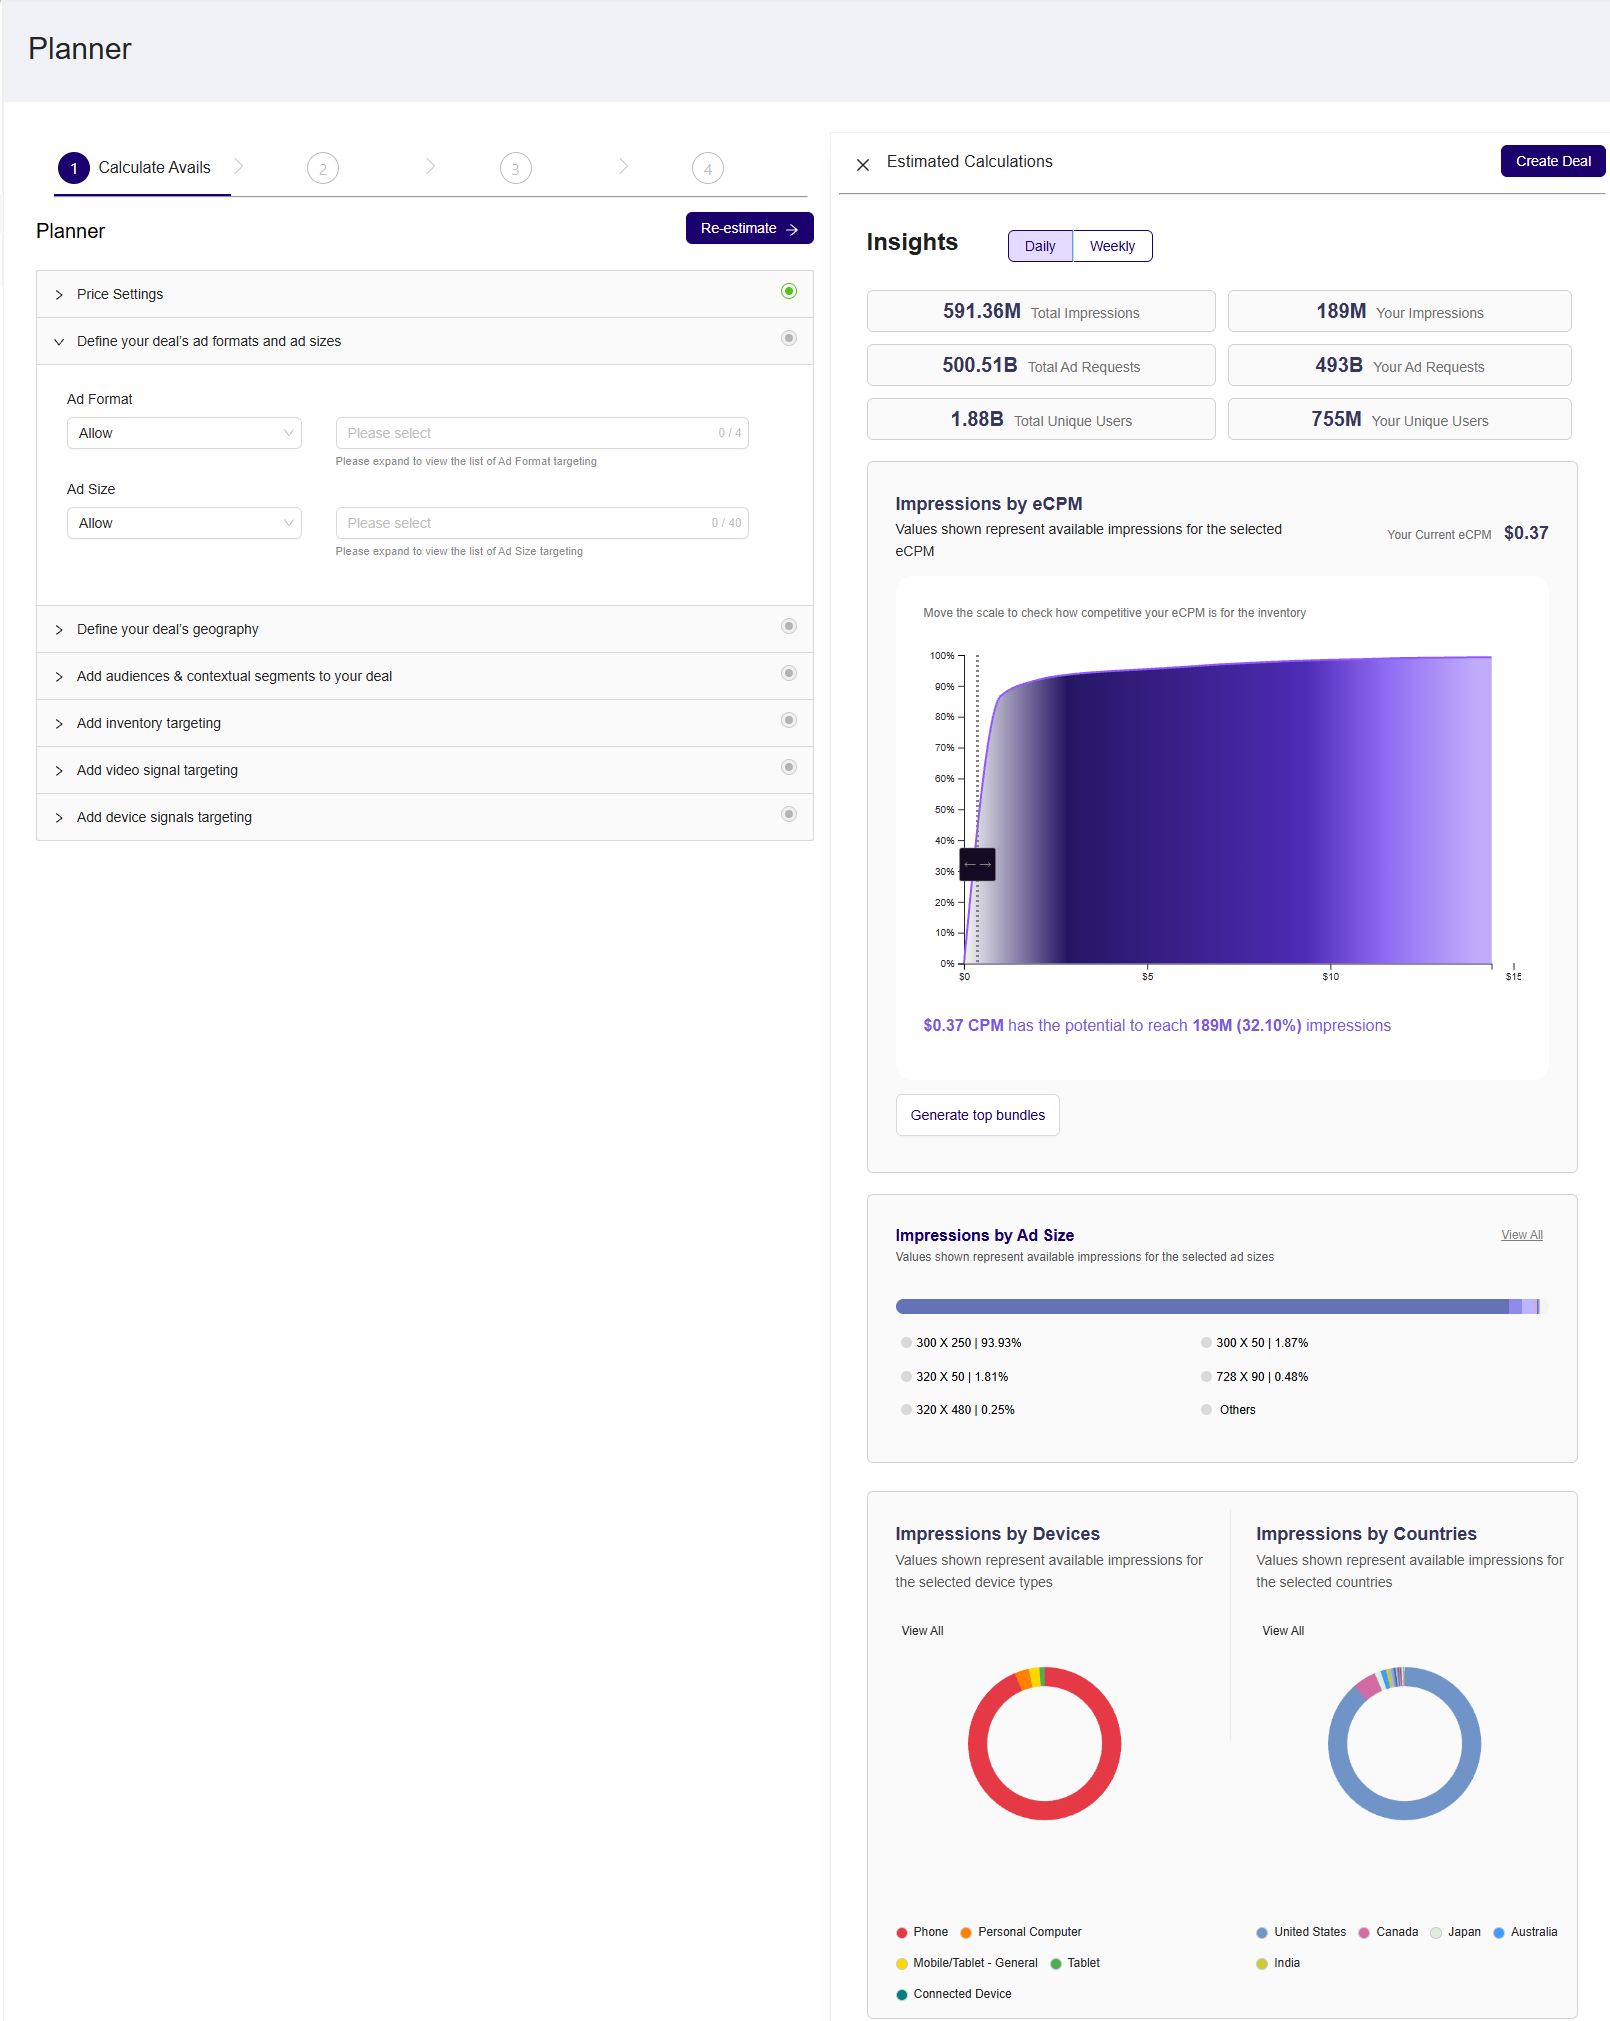
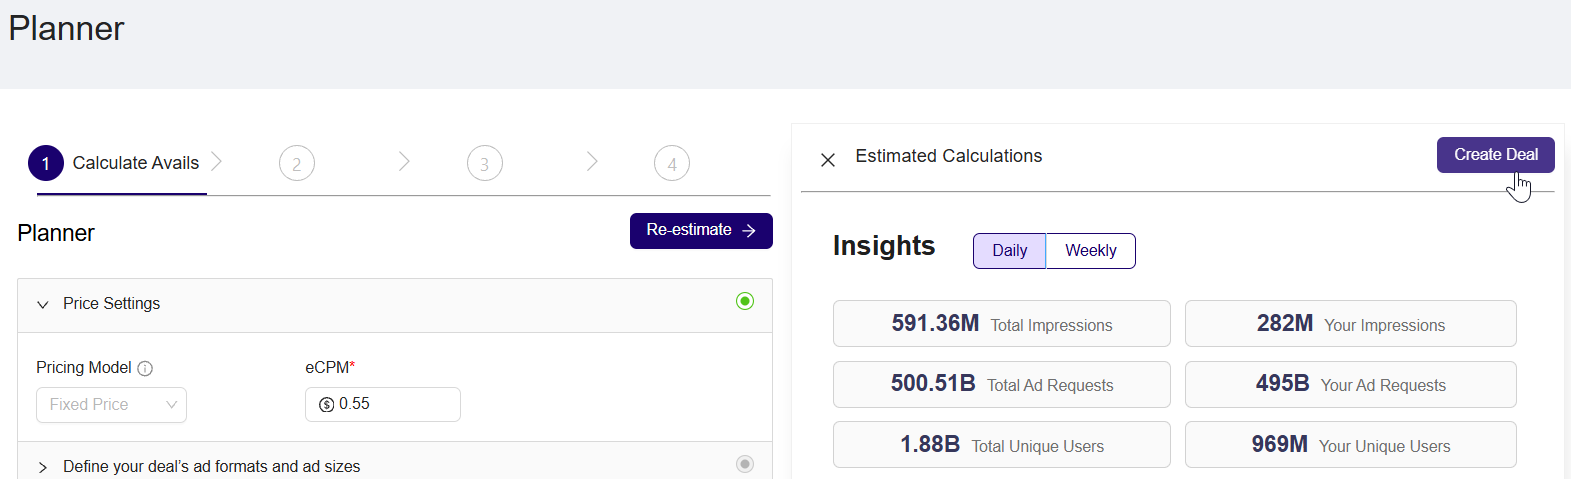
Once your deal plan is generated, the Estimated Calculations section will display:

-
Re-Estimate:
- After completing the steps above, click Re-estimate to update your avail calculations based on the defined parameters.
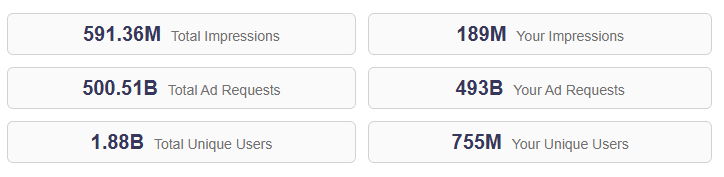
- Impressions: Displays the total estimated Ad requests for the selected CPM value, shown in the Figure above (for example, 1.5 million Ad Requests).
-
View Insights:
- In the Insights section, select the Daily tab to analyze performance on a daily basis (for example, monitor total ad requests, your ad requests, and CPM for each day).
- If you want to track the performance over a longer period, switch to the Weekly tab. This will show aggregated data for each week, allowing you to compare weekly trends in ad requests and CPM.
-
CPM Evaluation:
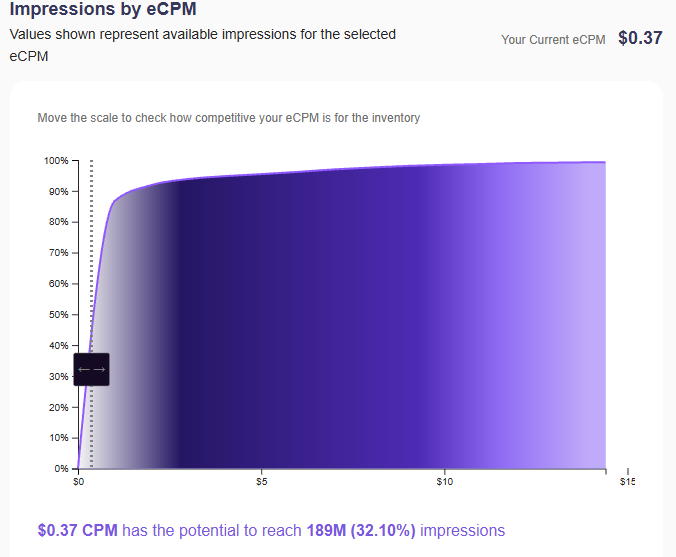
- View the CPM chart in both Daily and Weekly tabs. Analyze how your CPM is performing across different days or weeks.
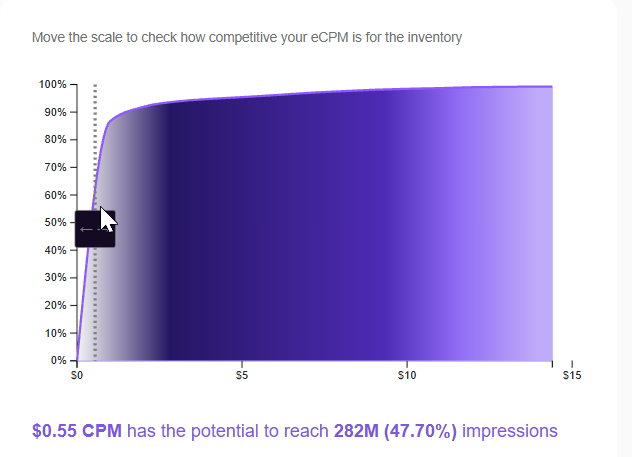
- Move the slider on the CPM scale to adjust the CPM value, the chart will dynamically update, showing how different CPM values affect the available impressions.
- Update your CPM if necessary by clicking Update CPM.
-
After reviewing the avail calculations and insights, click on Create Deal to finalize and create a deal.
Create a deal
After finalizing your plan and estimation, you are ready to create a deal for your ad campaign. For detailed workflow, see Creating a Deal section.
Deal Setting
Follow these steps in the Deal Setting section to create a deal:
Fill in the required information on the Deal Settings section:
-
Deal Name:
- Enter a unique deal name in the Deal Name field.
-
DSP:
- Choose the DSP (Demand-Side Platform) from the dropdown menu.
- The other fields on the Deal Settings section are optional. You can choose to fill them in or leave them blank.
-
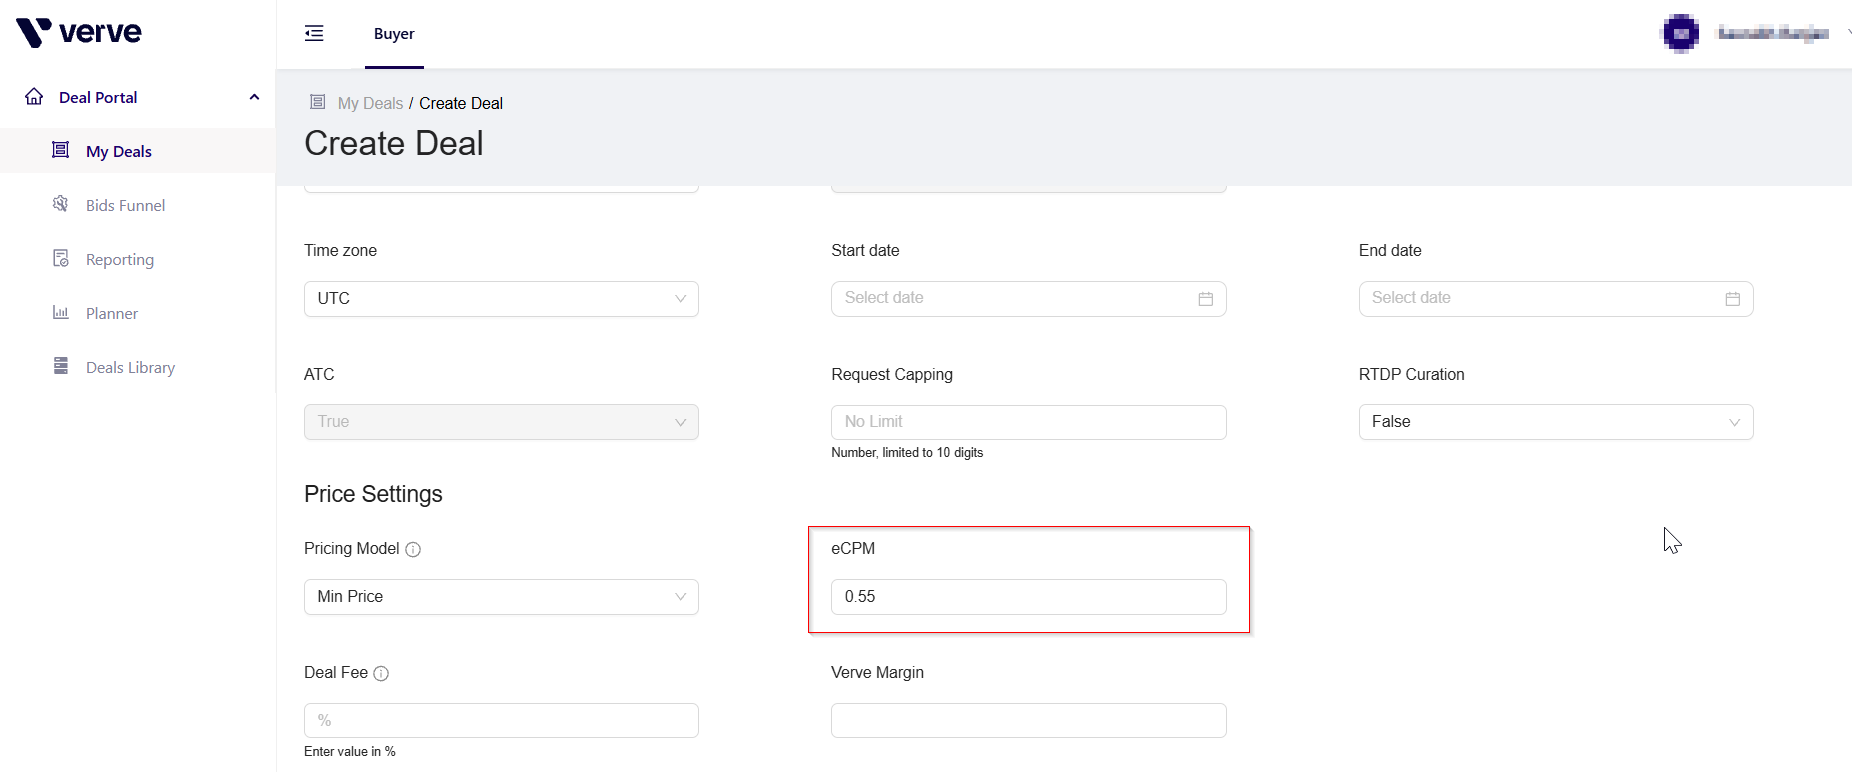
eCPM:
-
The eCPM field in the Deal Settings is automatically populated with the value entered during the avail estimation.

-
-
In the Price Settings section:
- The Pricing Model will be Fixed Price from avail calculation.
- The CPM values will be pre-filled in based from avails CPM value.
- The other fields in the Price Settings section are optional
-
In the Deal Reporting Labels section, all fields are optional. You can choose to fill them in or leave them blank.
-
Review all the mandatory fields in the Deal Settings section and then click Save and Continue.
Edit a deal
The Edit Deal page will open, allowing you to review and make changes to the parameters you selected during the planning stage.
Targeting Setting
In the Targeting Setting section, follow these steps to review and update the selected parameter. For detailed workflow, see the Setting Deal Targeting section.
- Define your deal’s ad formats and ad sizes:
- Review the Ad Size parameters selected during deal planning (for example, Ad Sizes: 300 x 250, 728 x 90).
- You can remove selected parameters and add new ones from the Ad Size dropdown. Any changes will update the deal settings, making them different from the original deal plan.
- Define your deal's geography
- Review the selected country during deal planning (for example, Country selected: US)
- You can remove selected country and add a new country. Any changes will update the deal setting, making them different from the original plan.
- You can add parameters to further customize your deal, adjusting it to meet specific requirements beyond the initial plan.
- Click Save and Continue to view the deal summary.
Summary
After completing the setup for Deal Setting and Targeting, you are directed to the Summary Page.
- You will review all of the key details summarized in the page:
- Deal Settings: Ensure the Deal Type, Deal Name, Time Zone, ATC, and Request Capping are correct.
- Price Settings: Review the selected pricing model, minimum price, and audience discount rules to ensure accuracy.
- Targeting: Review the selected parameters (Ad Size, Geography, Device Type) and their associated statuses ALLOW/BLOCK).
- After reviewing all the sections, you can:
- Click Save As Deal to save the deal with all the current settings.
- If further changes are needed, you can navigate back to previous pages for additional changes.
- Your new deal is created and can be accessed directly from the Dashboard.
Updated about 11 hours ago