Deals Library – Creating a Deal
Overview
The Verve Deal Portal enables you to create a deal by choosing from the Deal Library. Each pre-defined package is based on a specific theme or season. It includes a default set of targeted items and an eCPM, both of which you can modify later in the setup.
Each pre-defined package includes:
- A thematic label (for example - Earth Day, Graduation Season)
- fixed number of targeted items (for example - apps, domains, placements)
- A pre-assigned eCPM (effective cost per thousand impressions)
Prerequisite
Before creating a deal from the Deal Library page, ensure the following:
- You have a registered user account and buyer account
See Registering your User Account - You are logged into the Deal Portal.
See Logging into the Deal Portal
Accessing Deal Library
To access the Deal Library page:
- Navigate to the Deal Portal Dashboard page, then click on Deals Library in the left-hand navigation menu.
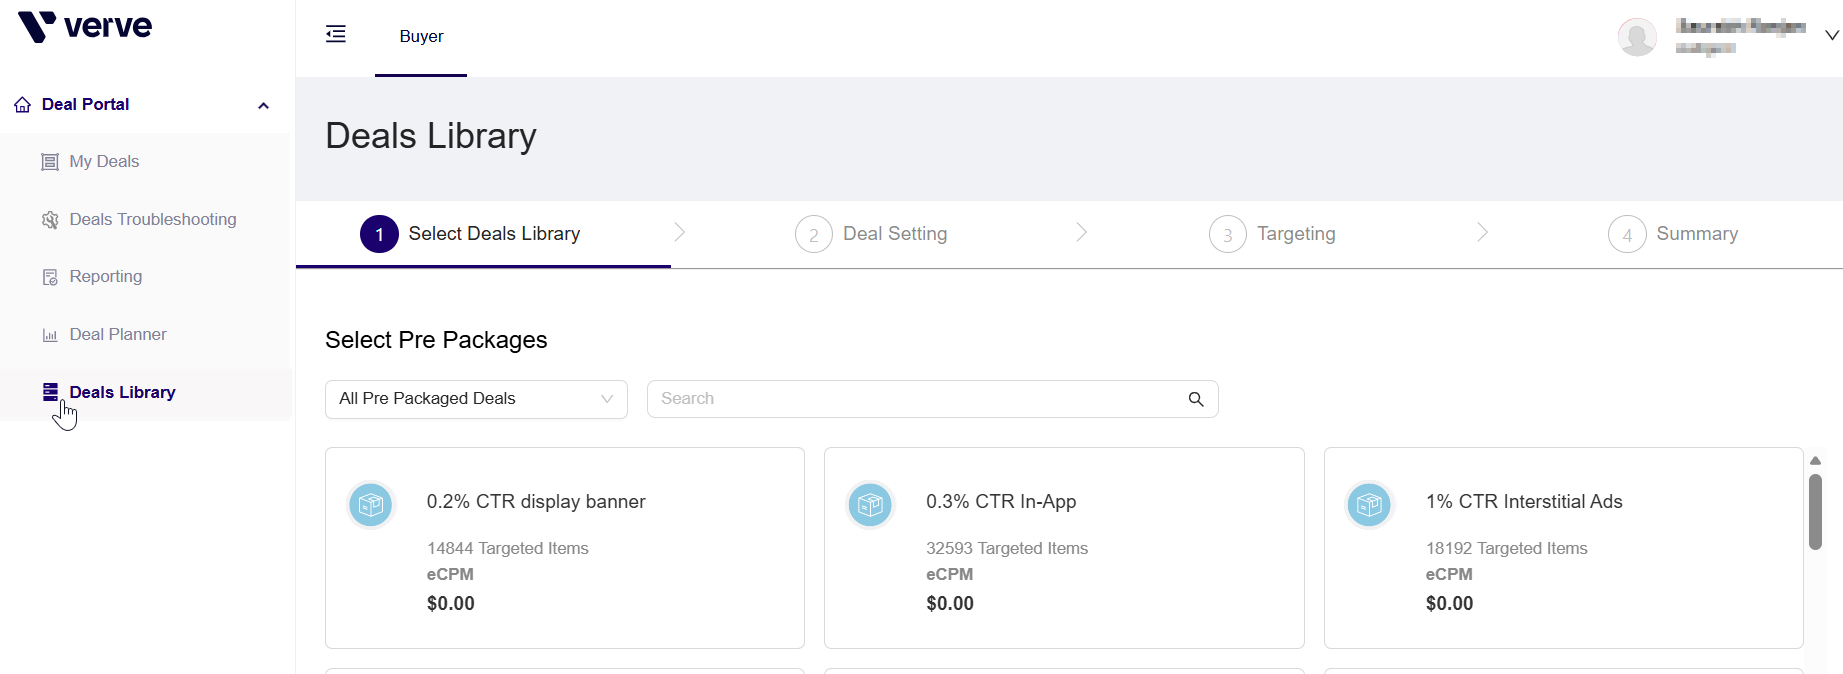
Accessing Deal Library
- In the Select Pre Packages section, you will see a gallery of pre-configured inventory deals.

-
These include thematic or content-based deals like:
-
Alcohol Ads – Bundle/Domain List
-
Gambling – Bundle/Domain List
-
Premium USA – Bundle/Domain List List
-
Comedy – CTV
-
Creating a deal from deals library
This section provides workflows for creating a new deal from the Deal Library in the Deal Portal, including:
- Deal Library
- Deal Setting
- Targeting Setting
- Summary
Deal Library
The Select Deal Library section is the first step in the deal creation workflow.
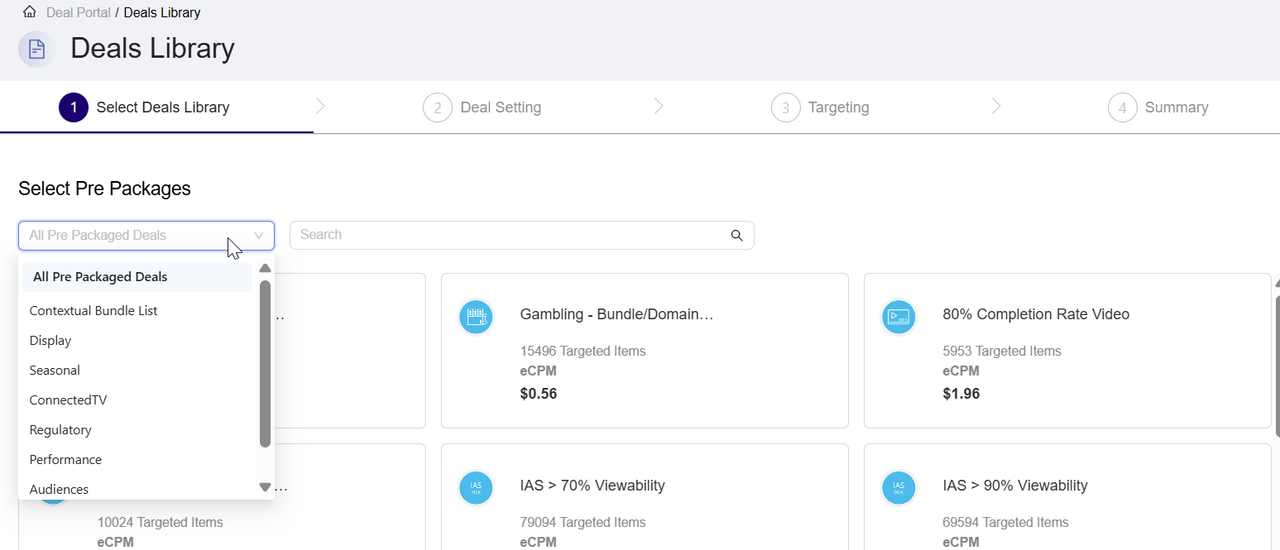
Filtering Inventory Pre Packages by Type
To narrow down the list of available inventory bundles:
-
Navigate to the Select Pre Packages section. This section displays a dropdown and a search bar for filtering.
-
From the dropdown, click to view a list of available package categories. The Categories may include:
- All Pre Packaged Deals
- DOOH (Digital Out-of-Home)
- Contextual Bundle List
- Direct/Indirect Targeting
- Performance
- Long Form Video
- In Game Advertising
- Regulatory
- and others depending on availability.

- Select a category to filter the displayed prepackages. The page displays only bundles matching the selected type.
- Click in the search box on the right and begin typing the name of the inventory prepackages you wish to search.
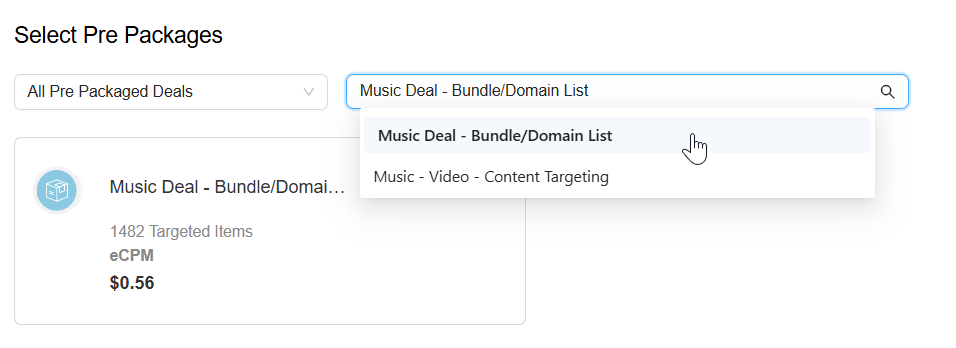
- Each deal card shows:
- The deal name
- Number of targeted items (domains, bundles, publishers, etc.)
- eCPM price

- Click any deal card (e.g., Music Deal - Bundle/Domain List). A Pre Packaged Deal Details dialog box appears, showing a curated list of Bundles and Publishers included in the deal (for example,
beatmaker.edm.musicgames.beathop,com.agminstruments.drumpadmachine).
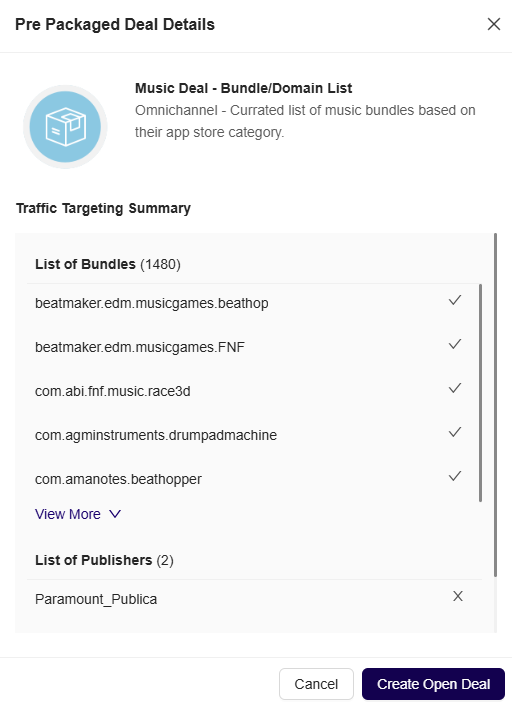
- After reviewing the targeting configuration, click the Create Open Deal button to proceed. This auto-populates the deal setup form with the selected targeting.
Deal Setting
Follow these steps to create a deal from the selected prepackage inventory. For Deal Setting configuration details, see Creating a Deal:
-
In the Deal Setting page, enter the required fields details such as:
-
Deal Name
-
DSP
-
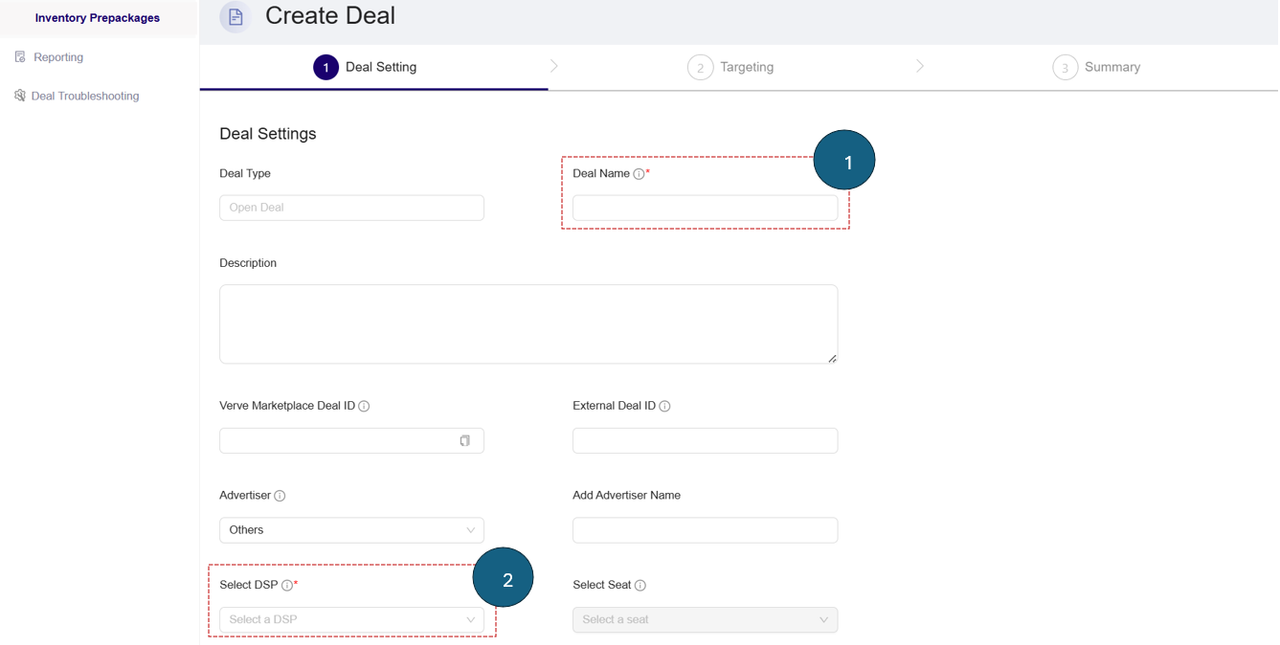
- In the Deal Setting page, review or adjust the fields details such as Pricing Model, eCPM.
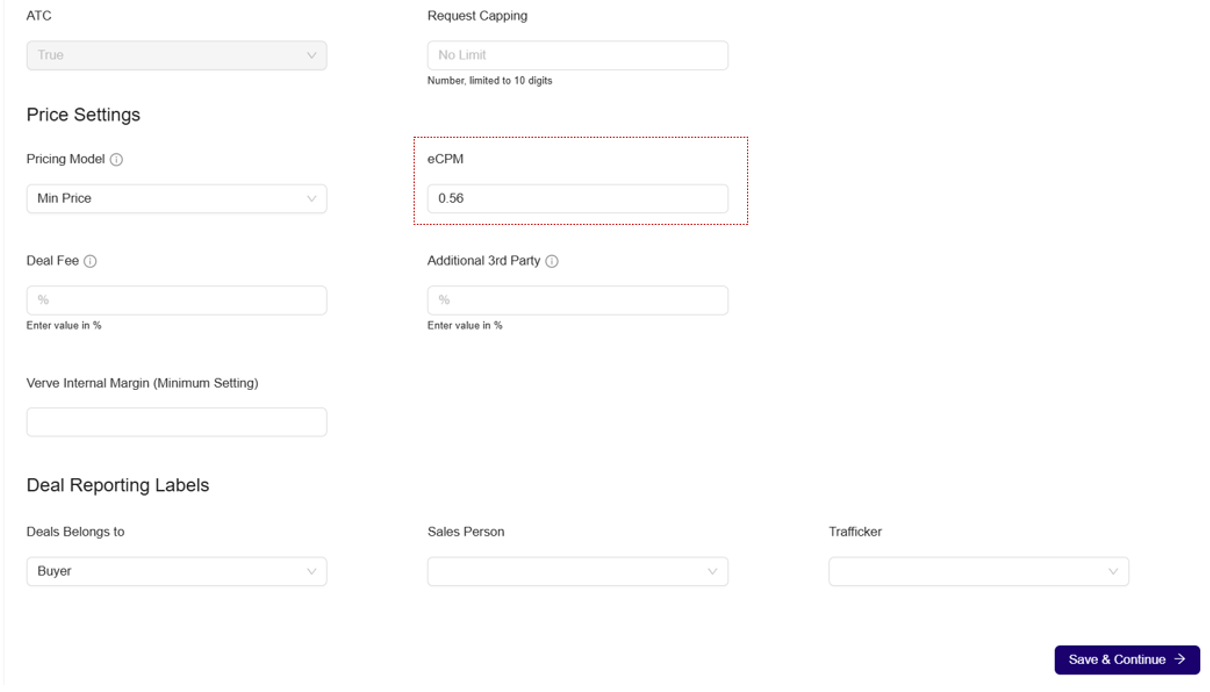
- Click the Save & Continue button. The targeting section page will open.
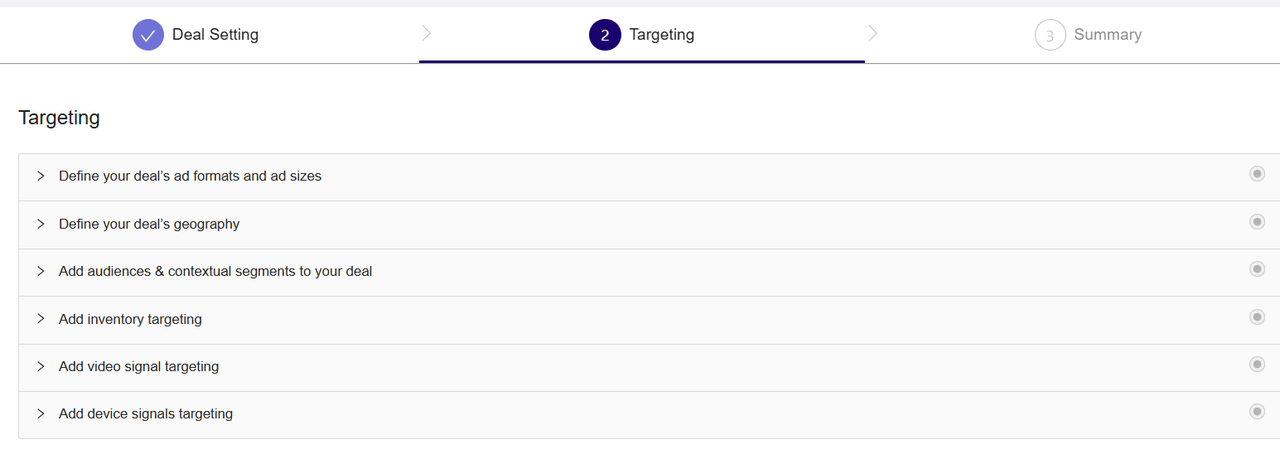
Targeting Setting
When you open the Targeting section, several fields are pre-filled from the selected Pre-Packaged Inventory Deal. For example, selecting Gambling – Bundle/Domain List pre-fills relevant targeting fields.
See Setting Deal Targeting for the full Targeting Setting workflow.
Follow the steps below to configure the Targeting settings:
- You can review or adjust the following targeting options:
- Ad Format and Ad Size
- Deal's Geography
- Audience & Contextual Segments
- Inventory Targeting
- Video Signal Targeting
- Device Signals Targeting – Pre-filled based on the selected deal.
- To configure Ad formats and Ad sizes targeting, Click Define your deal’s ad formats and ad sizes to expand the section.

-
Under Ad Format:
- Use the dropdown on the left to choose the following option:
- Allow: Only the selected ad formats will be included in targeting. All others will be excluded by default.
- Use the dropdown on the left to choose the following option:
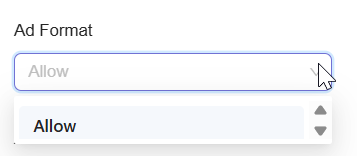
- On the right, click the field to expand the list of available ad formats.
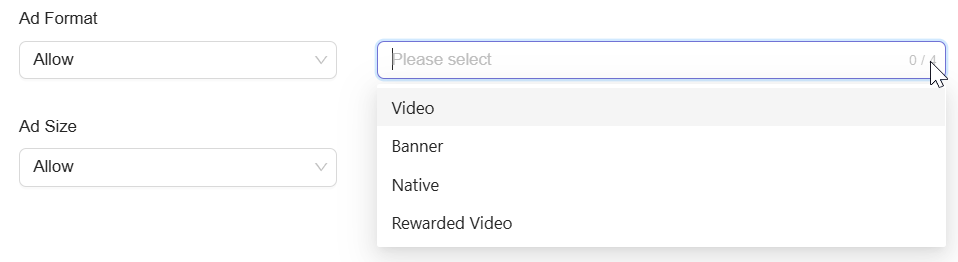
- Click to select up to one or more ad formats from the list.
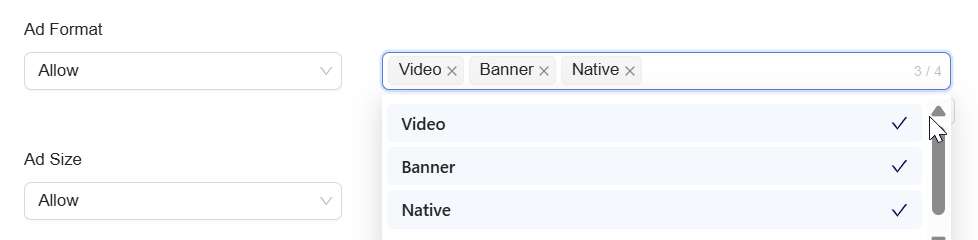
- Selected formats will appear inside the selection box with an option to remove.
-
Under Ad Size:
-
Use the dropdown on the left to choose one of the following dimensions:
-
Allow : Only the selected ad sizes will be targeted. All others will be excluded by default.
-
Block : All sizes are targeted by default except the blocked ones.
-
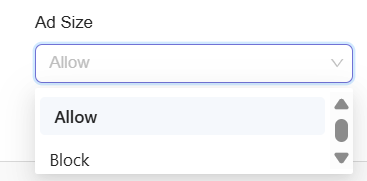
- On the right, click the field to expand the list of available ad size.
-

- Click to select up to one or more ad formats from the list.

- Selected formats will appear inside the selection box with an option to remove.
- Once selections are made, the system will automatically apply them. You can proceed to the next targeting section.
Summary
The Summary page displays all deal configurations for your review before finalizing. It consolidates Deal Setting, Targeting, and Pricing details into a single view.
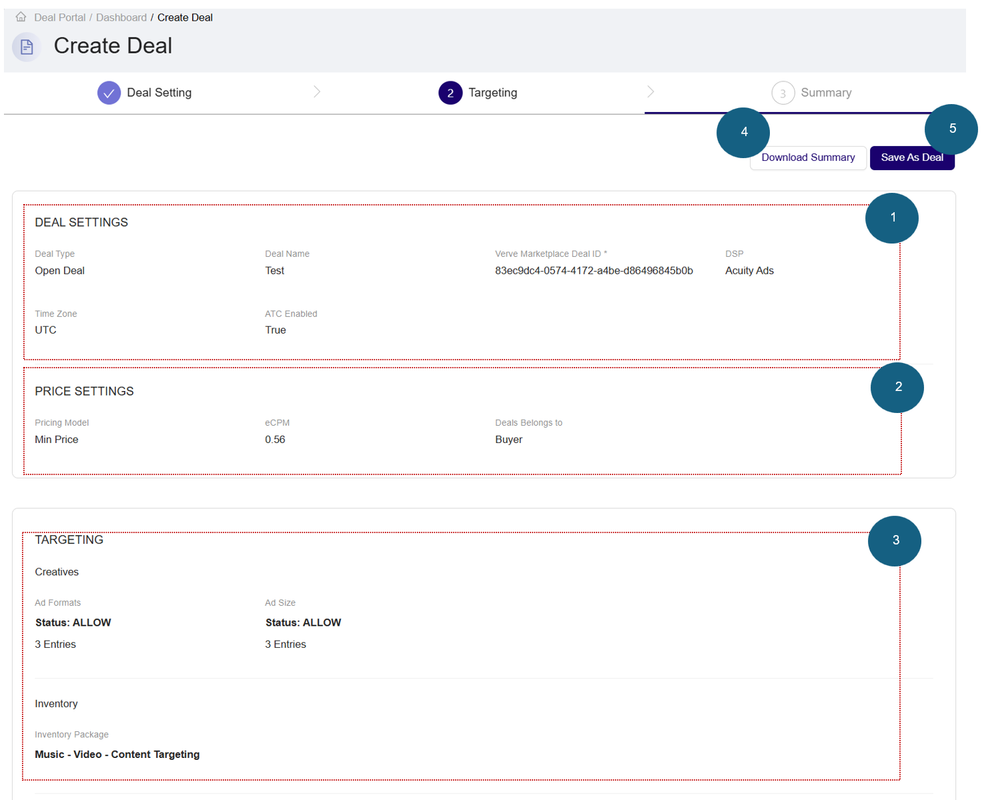
On the Summary page, review the deal, price and targeting settings before confirming to create a deal. For example, you can review the following fields in the Deal, Price, and Targeting Setting section:
-
Deal Setting:
-
Deal Type: Type of the deal (e.g., Open Deal or Private Deal).
-
Deal Name: The name you assigned to the deal.
-
Verve Marketplace Deal ID: Auto-generated unique identifier for internal tracking.
-
DSP: The demand-side platform associated with this deal.
-
Time Zone: The time zone applicable for deal activation and reporting.
-
ATC Enabled: Indicates whether ATC (Ad Targeting Control) is enabled (True or False).
-
-
Price Setting
-
Pricing Model: The pricing type selected (e.g., Min Price).
-
eCPM: Effective cost per mille (thousand impressions).
-
-
Targeting:
-
Ad Formats:
-
Status: Shows if ad formats are in ALLOW or BLOCK mode.
-
Entries: Number of ad formats selected (e.g., 3 Entries).
-
-
Ad Sizes:
-
Status: Shows if ad sizes are in ALLOW or BLOCK mode.
-
Entries: Number of ad sizes selected (e.g., 3 Entries).
-
-
Inventory Package: Displays the selected inventory package, such as:
- Music - Video - Content Targeting
-
-
Click Download Summary to export a downloadable version of the deal configuration
-
Click Save As Deal to save and activate the deal with the current settings.
-
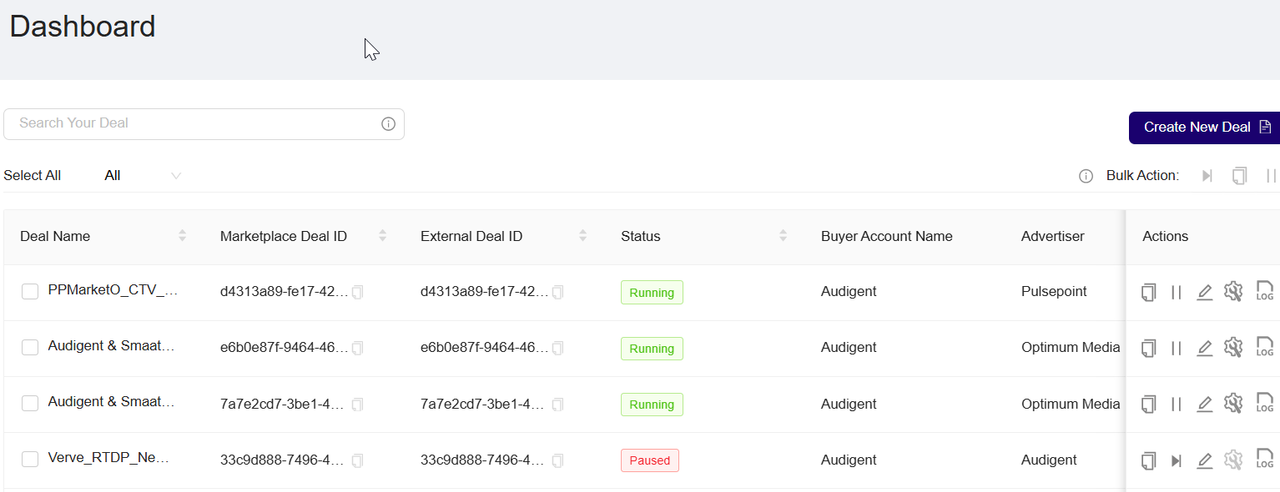
After clicking Save As Deal, the system saves your deal. You can view and manage it on the Dashboard page.
You can return to previous steps (Deal Setting or Targeting) using the navigation bar at the top if changes are needed.